How To Use Routes For All Maps
This guide describes how the maps can be used from a web browser.
When you choose to view the map showing all the routes overlaid onto a map of the area, the routes are shown in a variety of colours.
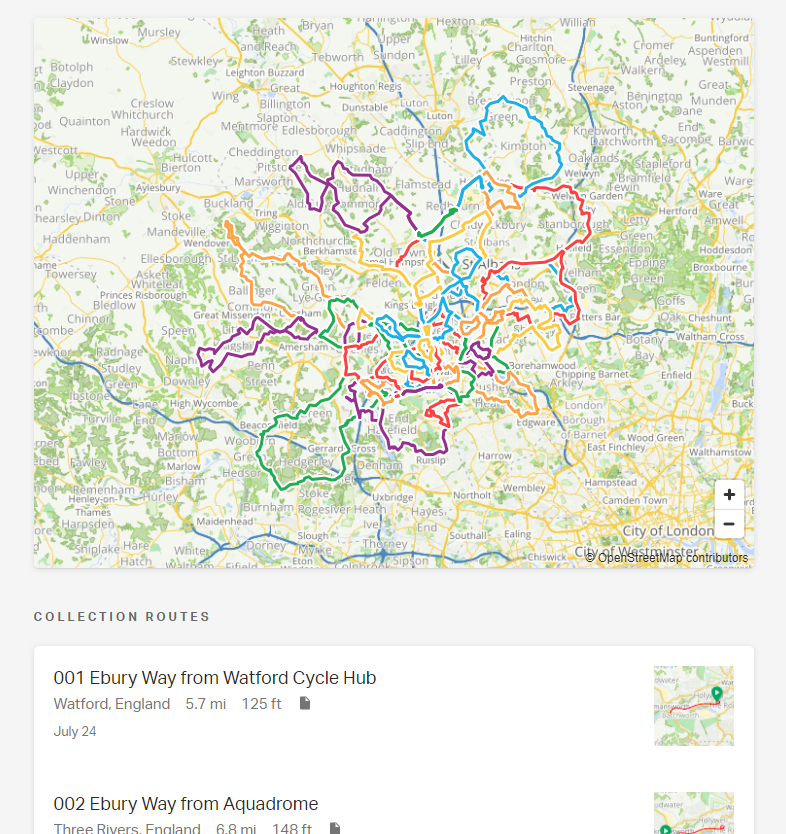
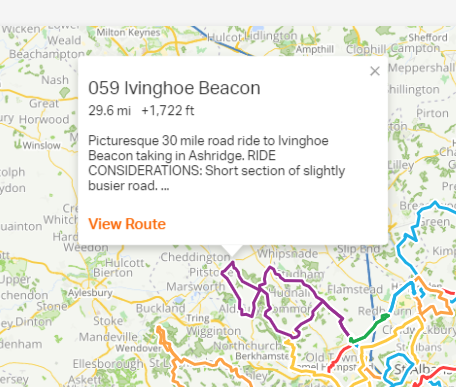
You can zoom in and out, and drag the map around within the window to view the routes. Parts of some routes will overlap with parts of others. Hover over any part of a route to see the whole route picked out in colour. Click on a route to see an information box for that route. You can then click on View Route to see the full details for the route. You can also select the route from the full list of routes below the map.
When you select a route from SPOKES Routes For All you’ll be presented with a map for that route. Some of the routes have an alternate route option. This is shown by a symbol (see the key below) on the map close to where the routes differ. If you click on the symbol, details of the alternate route are shown. In some cases there is the option to click on a link and you will be presented with a map for the alternate route, which can be used in the same way as the initial map.
The map is presented by a web application called RideWithGPS. You don’t need to have an account for this web site to see the maps and the instructions below assume that you don’t. However if you have an account, you will have more features available to you and you will see slightly different screens than are shown below.
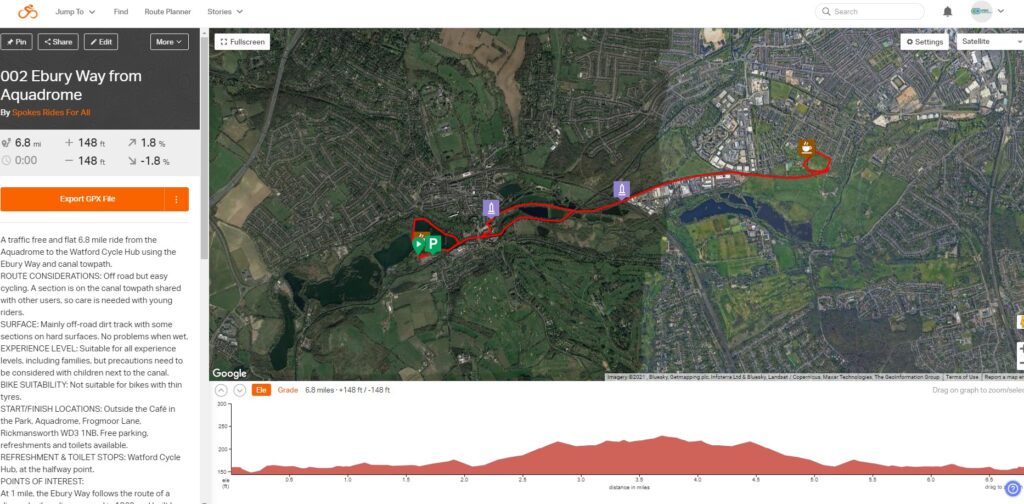
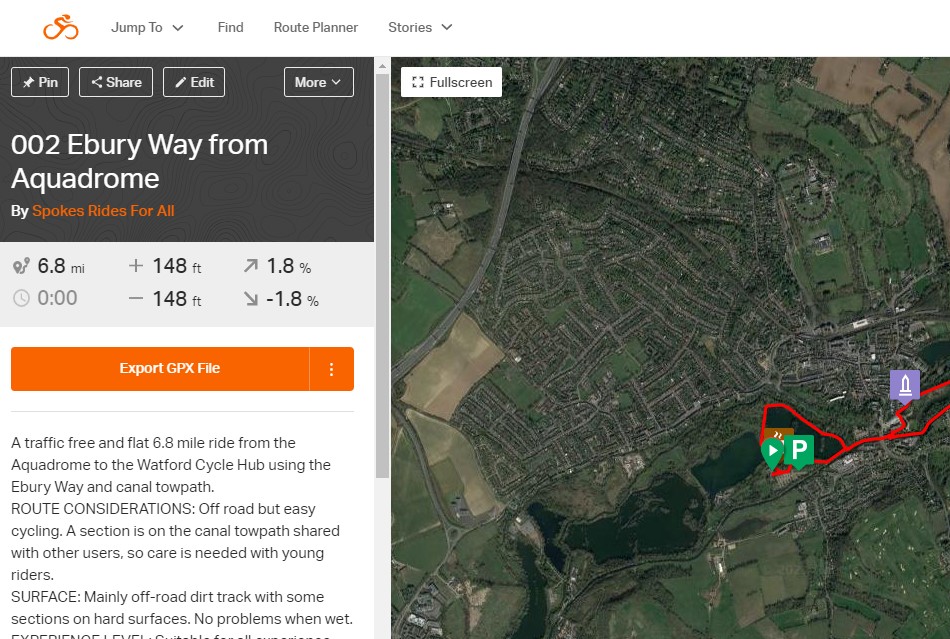
We’ll continue on the basis that you don’t have an account. The route is shown in red with green and red balloons showing the start and end points. Below the map is the elevation profile of the route.
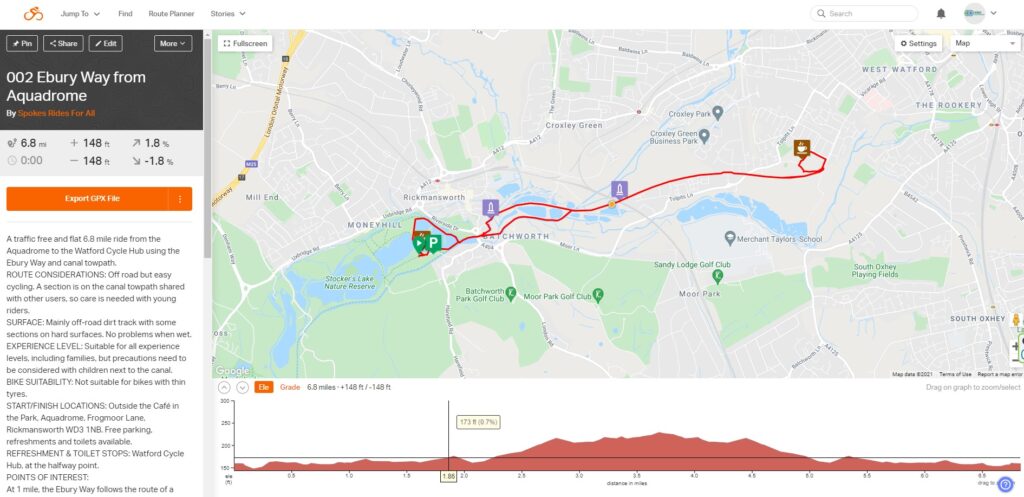
Don’t be put off by seeing what appears to be a steep slope on the elevation profile. The vertical scale will show how much height you are gaining, and even a gentle slope can look steep. You can zoom in and out and move the map around, dragging the map with the cursor as you would with other applications. In the panel on the left you can see a description of the route including points of interest and refreshment stops.
Each route has an information panel on the left which includes details such as points of interest, refreshment stops and advisory information on the route. Scroll down to see all of the information. To print this route description, highlight and copy the text from the left hand panel of the map display, and paste it into a file that you are able to print.
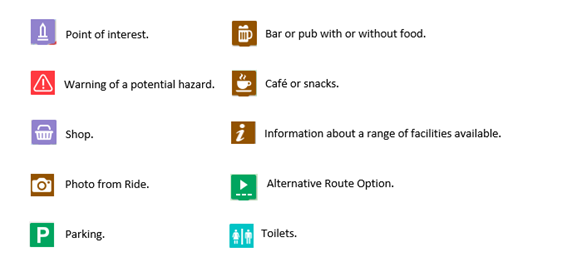
The maps may include symbols. These refer to locations mentioned in the route description and you can click on these for more information, web links and photos:
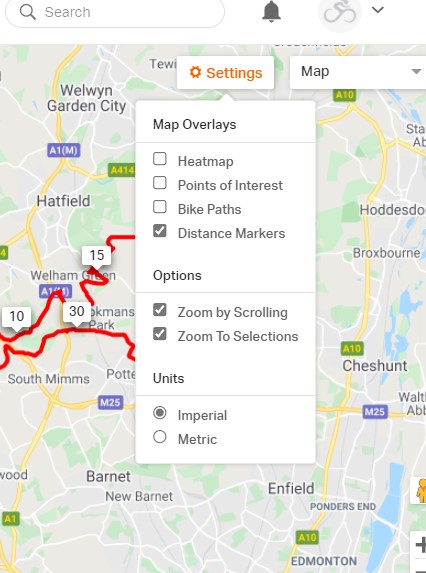
In the top right of the map, the type of map is shown, and you can click on the down arrow to see the other types of map you can view the route on. The example below shows a satellite view of the route. The OSM Cycle map is often the most useful to a cyclist.
If you want to remove the symbols from your view to see the route more clearly then select the settings box in the upper right section of the map, and then uncheck the points of interest box.
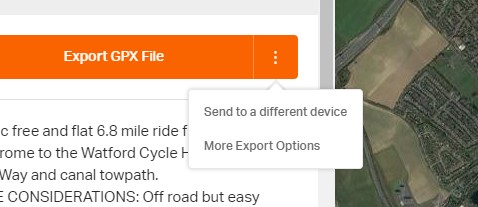
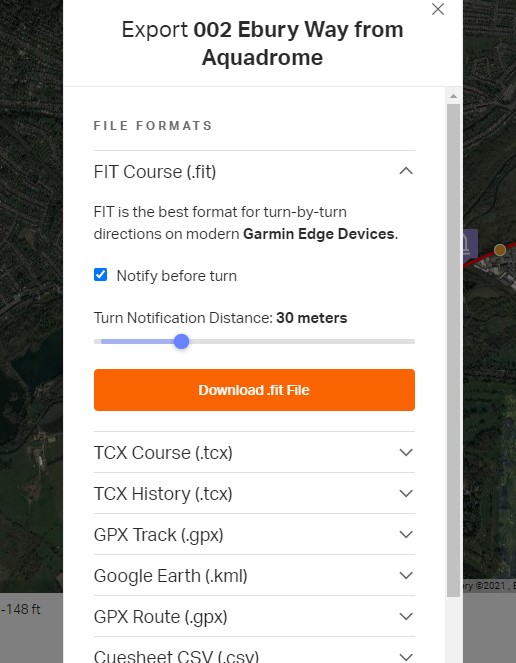
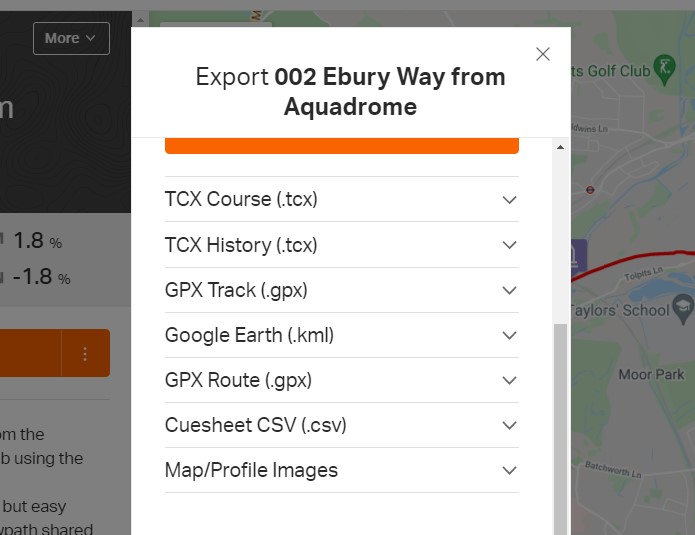
You can download narrative directions to guide you on the ride (this is referred to as a Cue Sheet) and you can download a GPX file to use in a GPS device or with an app on your phone. To download a GPX file, click on the three dots in the large orange box towards the top of the left hand panel. The orange box may contain a number of different titles, e.g. “Send to Device”, “Export GPX file”.
A box will pop up and you click “More Export Options”.
You’ll then see a further box with a number of different download options. Unless you are aware that you need a different format, the GPX track option should work in your device. Scroll to find the format you want and click on it.
You’ll then be offered the download option.
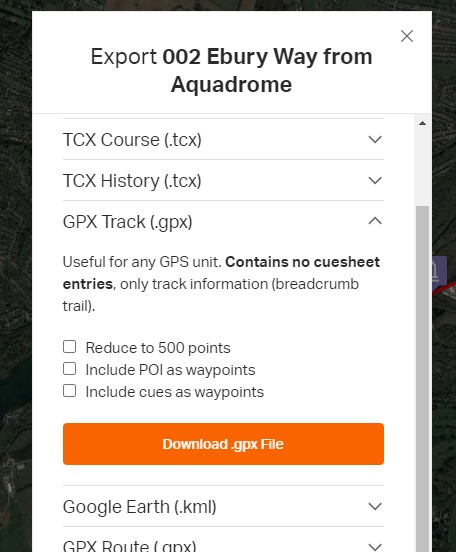
Click on “Download .gpx File” and how the download continues will depend on the browser on your computer. You can select other formats if you need these for your device.
Narrative instructions (cuesheet) are available. The content and how easy they will be to follow varies depending on the route. It will help your enjoyment of the route if, before you ride, you follow through the printed instructions on the computer map, using the map of the route that you were presented with when you selected the route. You can change the map type, zoom in and use Google streetview to explore the route and add any notes to the cuesheet that will help you when riding the route. It may also help if you print screen shots of the zoomed-in sections of any part of the route that you think may be difficult to follow when you are on the ride. Also it may be helpful to download a map image as well as the instructions. This isn’t useful for navigation but may be useful to add notes to that will help on the ride.
Some of the country areas may not have mobile reception, so if you are relying on being able to access a map on your phone whilst on the ride, you should download the map to your phone before you start.
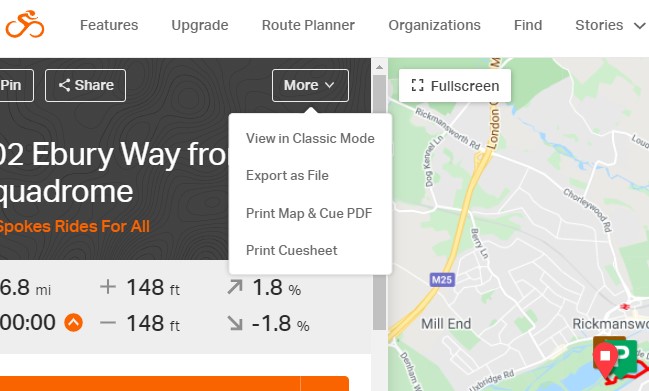
Given those caveats, we’ll go through downloading the cuesheet and the map image. To download the cuesheet or narrative directions click on the down arrow in the “More” box at the head of the left hand panel. Then click on “Print CueSheet” (note: Print Map and Cue PDF isn’t available without a RIDEWITHGPS account).
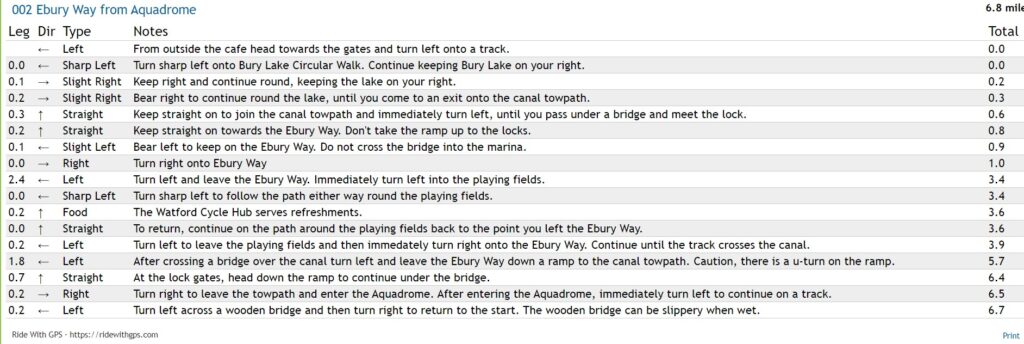
You’ll see the instructions, which you can print by clicking on the Print option in the bottom right of the screen. The column headed “Total” shows you the distance from the start at which you should execute the action.
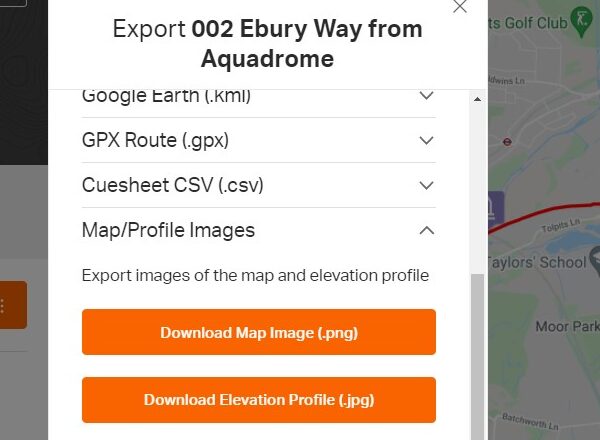
To download the map image follow the instructions to get to the point you were offered the download formats, i.e. Three dots-More export options.

Then scroll down to see the Map/Profile Images format.
Then click on “Download Map Image (.png)” and you’ll follow the download that your browser uses.
Enjoy your ride!